Cadence field desk

Find your treasure on Cadence.

Choose two screenshots, check the maps, then search. Full screenshots are welcome—you usually do not need to crop them first. See the picture guide below.
1 Check the treasure map2 Check the search circle3 Search and compare

Step 1

Upload the open treasure map

Open the parchment clue with the black X. Keep all four edges visible. You can choose a full game screenshot; the reader will look for the map inside it.

Step 2

Choose the blue-circle overview

Use the in-game Cadence overview with the blue hint circle. Zoom out until the whole island is visible. A full screenshot is fine, but a close-up of only the circle cannot locate it on the server.

Check your search area

Check that this circle covers the same part of Cadence as your blue hint. Click or drag its centre to correct it; enlarge the radius if needed. Coordinates are optional. Arrow keys move the circle too.

Ready to search?Choose the treasure-map picture in step 1.

How to choose good pictures

You need two different views of the same clue. These real examples show what to look for. Yours can include the rest of the game screen—the reader tries to select just the map.

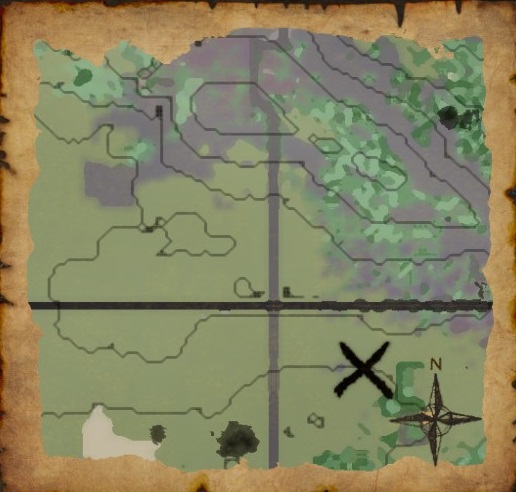
1. The parchment clue with the black X

Good treasure-clue example: the complete parchment, a road crossing, terrain, a black X, and the north compass are all visibleOpen this example at full size

This is the picture for step 1. The black X, roads, terrain and parchment edges are clear. The compass stays at the bottom-right; do not rotate the image.

  1. Open your treasure clue in Wurm. Move other windows and tooltips out of the way.
  2. Make the map large enough to see its roads and X clearly. Keep all four edges on screen.
  3. Take a screenshot and save it as PNG, JPG or WebP. PNG keeps fine lines clearest. Avoid a phone photo of your monitor.
  4. Click Choose treasure-map picture above, select the saved picture and click Open. Check the selected map and the X marker, then tick the confirmation box.

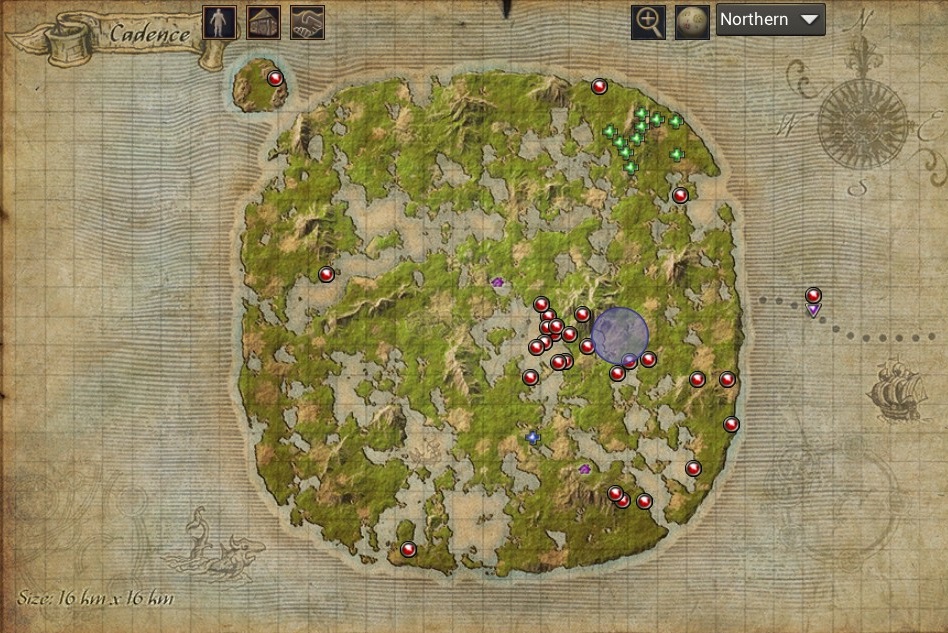
2. The Cadence overview with the blue circle

Good overview example: the whole Cadence island and coastline are visible, with a blue search circle east of the centreOpen this example at full size

This is the picture for step 2. The whole island gives the blue circle a location. Do not zoom in or crop the picture down to the circle alone.

  1. Use the treasure map’s Hint option to show its search area on the in-game map.
  2. Show Cadence and zoom out until the whole island is visible, with the blue circle still clear. Keep north at the top.
  3. Save a second screenshot. Click Choose blue-circle picture above and select it.
  4. Compare the search circle placed on this page with your original hint. Correct its centre or size if necessary, then tick the confirmation box.

Do I need to crop my screenshots first?

Usually, no. Choose the original screenshot. The reader looks for the parchment border, then takes the map from the full-resolution picture before making a smaller working copy. A very small, covered, cut-off or unusually coloured map may not be recognised.

If the selected area is wrong, choose Adjust map area. Click its top-left corner, then its bottom-right corner, and select Use selected map. Keep the parchment border. You can also adjust the four numbered edge controls with your keyboard.

After both pictures are checked

Press Find dig locations once. Reading and matching stay on your device, away from the page’s main controls; the search does not restart as you change a value. You can cancel a search. Compare the clue with the Yaga topographic preview before travelling, including the next suggestions if several look alike.

If something does not look right

  • No X found: check that step 1 shows the parchment clue, then click the centre of its black X.
  • No blue circle found: take an overview with the whole Cadence island visible, or click the hinted area on this page and adjust the search radius yourself.
  • The picture is blurry: use the original screenshot file, not a small image copied from chat. Enlarging a blurry picture cannot recover missing detail.
  • No clear match: check the selected map area, X and search circle. Old roads or missing terrain detail can make several locations look similar. The result is an estimate, not a promise of the exact tile.
What the matcher actually uses

A field aid, with the uncertainty left visible.

01

The map, X and ink mask

A small copy is scanned for a parchment frame. The original map is then extracted, and the X is checked for two diagonal strokes. Dense near-black areas are excluded from the relief samples so an ink blot is not mistaken for a hill.

02

Yaga topography

Broad flat areas, rugged ground, ridges and contour density are compared against Yaga’s topographic Cadence map. This receives substantial weight because land shape is often more dependable than a dark decorative mark.

03

Terrain and roads

Ground types and road structure are checked alongside the relief. The strongest coarse matches then receive a finer north-up search at smaller position and scale steps.

04

Topographic verification

Every selected candidate is shown on the contour map. Compare ridge direction and line spacing, inspect alternates, and dig around the estimate rather than treating one tile as guaranteed.